![]()
This was a page done completely with the intent of adding it to my Black Euro.. However, that car is gone now, but everything you see here either complete, or almost complete will find it's way to the Death Dealer.. Enjoy, and thanks for stoppin by..
Exhaust
The following pictures are plans for my exhaust. One of them is obviously not my car, but I "MSPainted" what my plan is to be using someone else's car, along with someone's Cadillac exhaust. The other two are of the tips themselves I plan on putting on my car. Those will wait until I can get headers of some sort, and Flowmaster Delta 40 mufflers. Enjoy these pictures!
 I whipped this "MSPaint" up in about 3
minutes. It illustrates my idea pretty well of what I want for my exhaust. I only used
this guy's car for my plan because the angle was exactly the same as the Cadillac I found
to use the tips from. But, this is my plan, after I get headers, and Flowmasters!
I whipped this "MSPaint" up in about 3
minutes. It illustrates my idea pretty well of what I want for my exhaust. I only used
this guy's car for my plan because the angle was exactly the same as the Cadillac I found
to use the tips from. But, this is my plan, after I get headers, and Flowmasters!
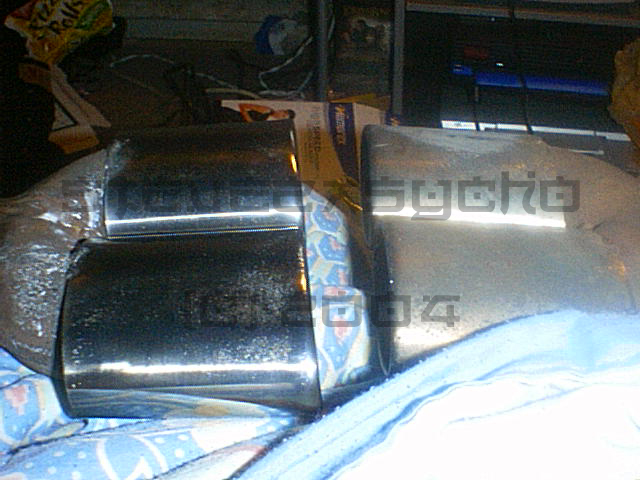
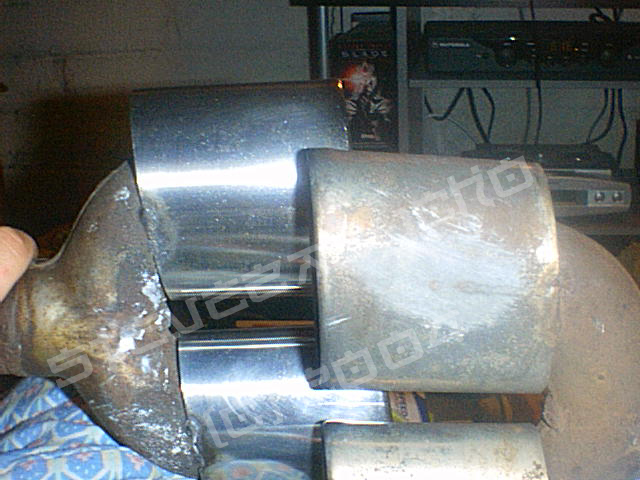
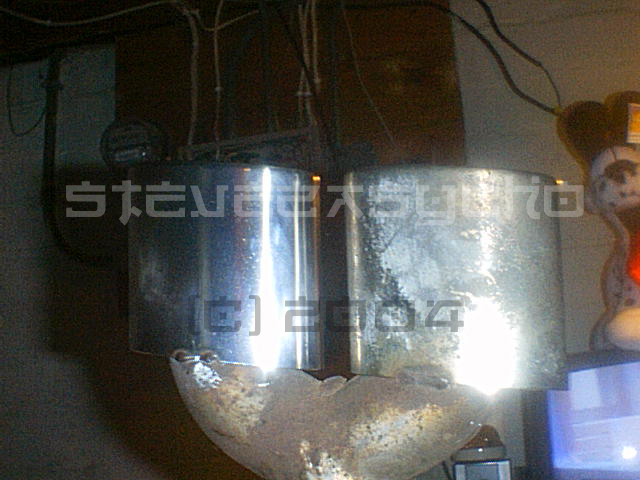 Here are a couple of
pictures of my exhaust tips. I have both sides polished, but these are before and after
pics from what I started with to what I came up with after 50+ hours using VERY fine steel
wool, and an aluminum polish that actually wasn't too harsh on the nose. Well worth the
effort, and I can't wait to get my Flowmaster Delta 40. I am doing one live muffler and a
dead one just for looks until I can get my headers made. Man.. I do great work!
Here are a couple of
pictures of my exhaust tips. I have both sides polished, but these are before and after
pics from what I started with to what I came up with after 50+ hours using VERY fine steel
wool, and an aluminum polish that actually wasn't too harsh on the nose. Well worth the
effort, and I can't wait to get my Flowmaster Delta 40. I am doing one live muffler and a
dead one just for looks until I can get my headers made. Man.. I do great work!
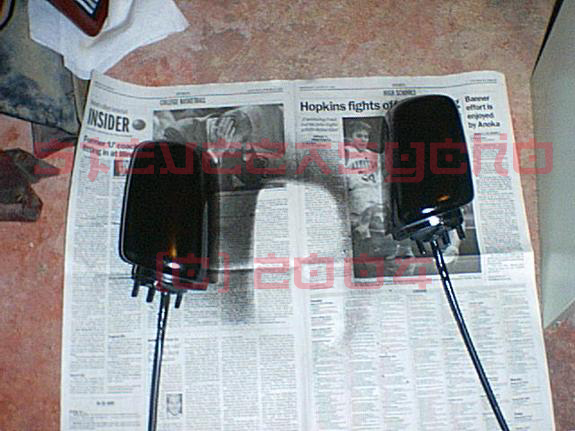
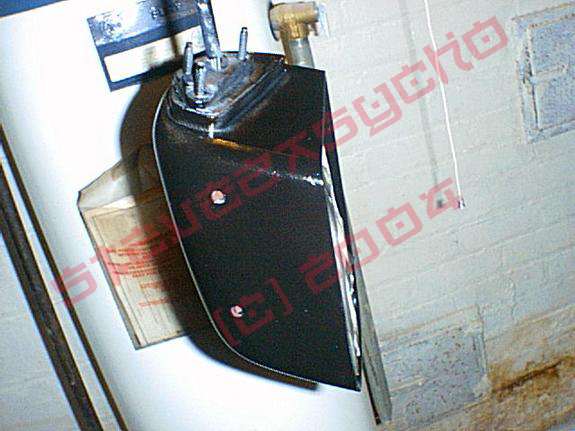
Mirrors
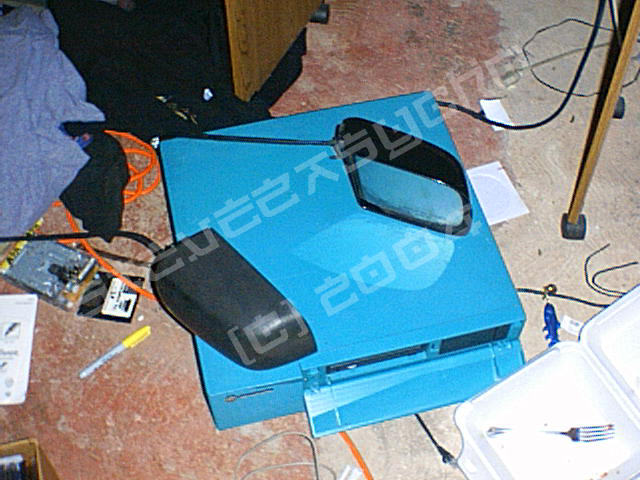
I didn't much care for the gray accents that Chevy put on the Lumina Euros when I bought the car. But, hey, for $200.00,I couldn't complain. I lived with the mirrors all summer after I bought the car, but that all changed in January, 2004. Some moron decided they didn't much care for my mirrors either so the clipped the right side and shattered it into a million pieces. Well, maybe 3 or 4, but the point is, I got to buy new mirrors! Since I already didn't care for the light gray, I bought black mirrors, sanded them, primed them, painted and clear coated them, and finally let them harden for a few days. I had initially taken pictures of the overall process of painting them, but my digital camera went to hell temporarily and erased my entire flash card. But, I do have the initial picture I took the day I brought them home, and 2 pictures of the finished mirrors. I will highlight their install here when it warms up and I can wash my car!
Interior Refinements
This section is highlighting my interior refinements. On a scale of one to ten, I would rate my interior as a high seven to low eight. It has its trouble sopts, but tthere are spots where it is beginning to come together.
Interior Completed Items Check List:
Purchased and installed 1994 Grand Prix center console with cup holders
Installed leather shift boot from Achieva SCX for some reason
Installed Grand Prix SE bucket seats
NOTE: After about a month of my Grand Prix console in, I got a new top piece from a 95. The cupholders are bigger, and up near the armrest.
NOTE: Because I got the new top, I had to re-work the shift boot install. Check it out!
![]() Interior To be Completed Check List:
Interior To be Completed Check List:
Modify dash to hold all my digital goodies
ALL black surfaces
Leather seating surfaces
3 knob HVAC control unit UNDER the dash
Fiberglass 3 knob HVAC housing to the dash
Other things.. Look for more
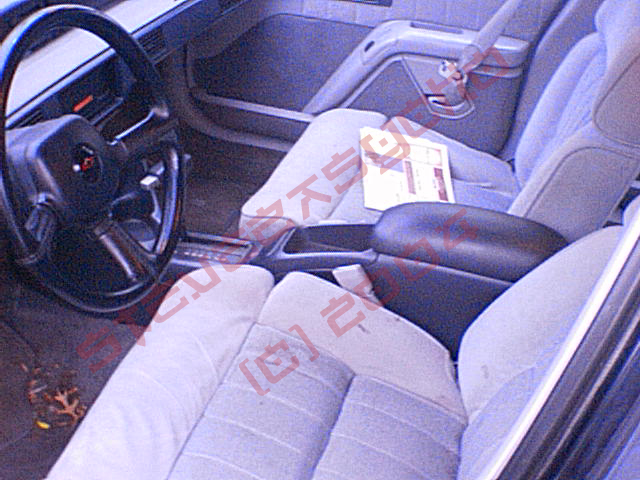
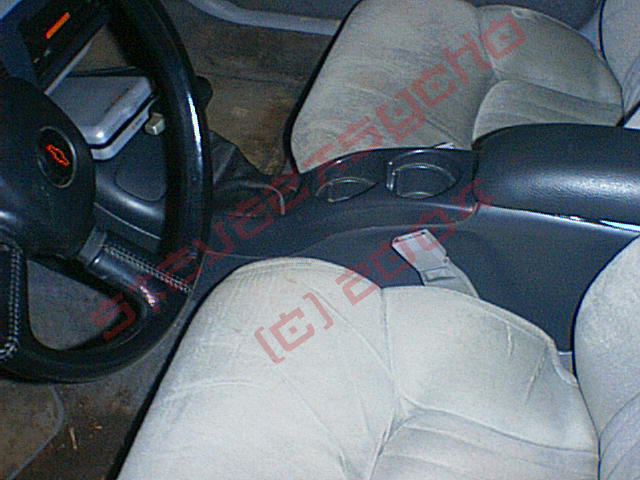
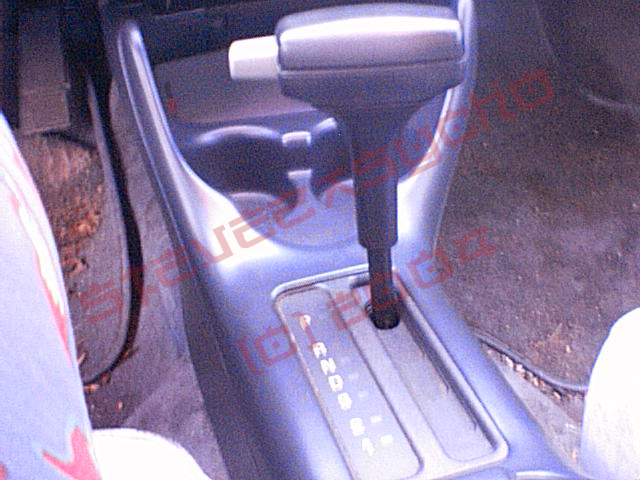 These are slightly dated pictures.
First off, there is no boot on it. My OLD Lumina "ice cube tray" seats are still
there, and the cupholders are in the wrong spot. But hey, still a better console to have,
I'm tallin ya.. By the way, the top piece of the 1994 Grand Prix console is for sale!
$20.00 plus shipping. Let me know if you want it!
These are slightly dated pictures.
First off, there is no boot on it. My OLD Lumina "ice cube tray" seats are still
there, and the cupholders are in the wrong spot. But hey, still a better console to have,
I'm tallin ya.. By the way, the top piece of the 1994 Grand Prix console is for sale!
$20.00 plus shipping. Let me know if you want it!
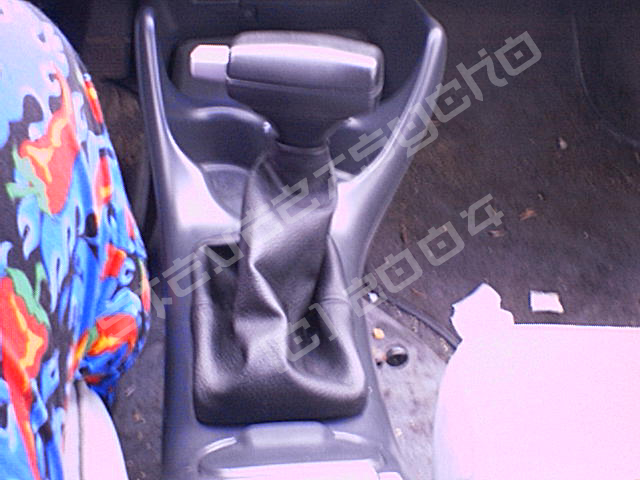
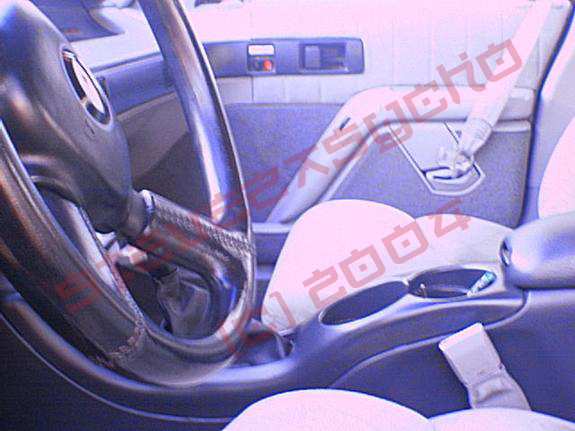
 BEFORE pic of
the 94 console, and shift boot. It looked great, but I really wanted the 95-96 GP console
because the cup holders are up closer.. And hold pop bottles better.
BEFORE pic of
the 94 console, and shift boot. It looked great, but I really wanted the 95-96 GP console
because the cup holders are up closer.. And hold pop bottles better.
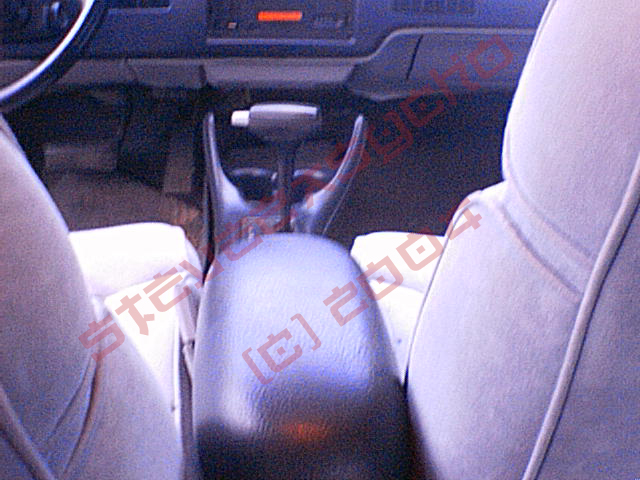
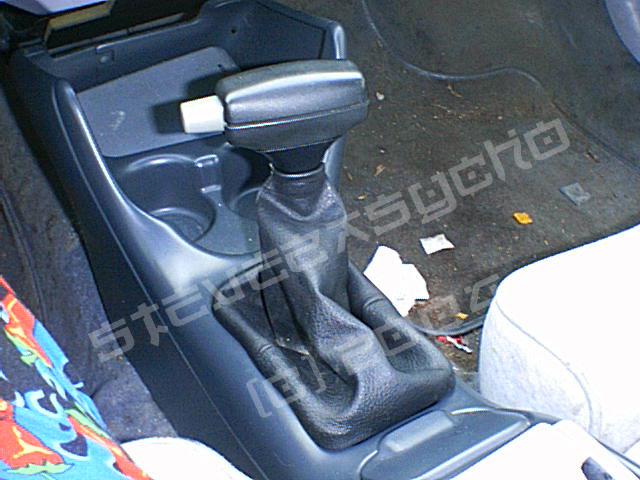
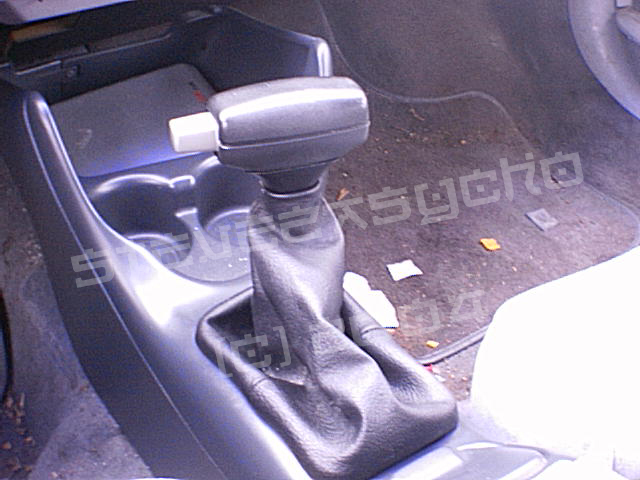
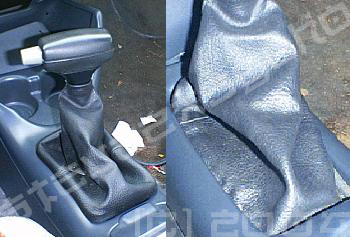 Nice shot of the new
piece installed, and a
nice before and after shot of the shift boot.. Basically, you can now say that this boot
is here to stay.. I had to alter it because the valley in this console is a lot more
concaved, to the way I had the boot on there before wouldn't work. So, I ripped that off,
got out my 3M hyper-adhesive, and glued it onto the old shift indicator that came with
this console. (I used the one that came with it because it had pop and god knows WHAT ELSE
on it..)So, it's still the same boot, just a much more painstaking install.. A new LED
system is in order for this thing however.
Nice shot of the new
piece installed, and a
nice before and after shot of the shift boot.. Basically, you can now say that this boot
is here to stay.. I had to alter it because the valley in this console is a lot more
concaved, to the way I had the boot on there before wouldn't work. So, I ripped that off,
got out my 3M hyper-adhesive, and glued it onto the old shift indicator that came with
this console. (I used the one that came with it because it had pop and god knows WHAT ELSE
on it..)So, it's still the same boot, just a much more painstaking install.. A new LED
system is in order for this thing however.
![]()
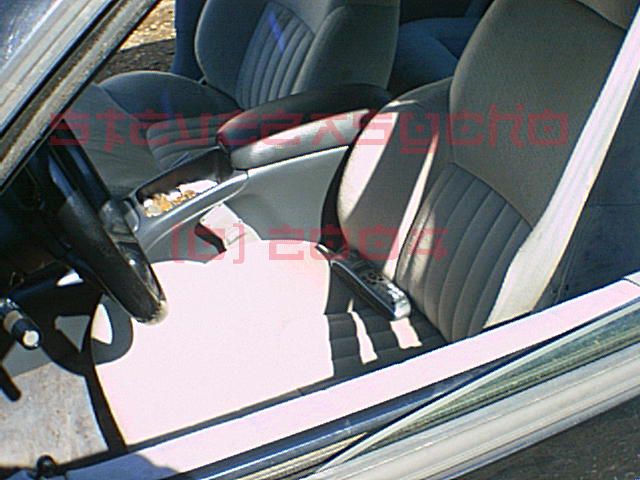
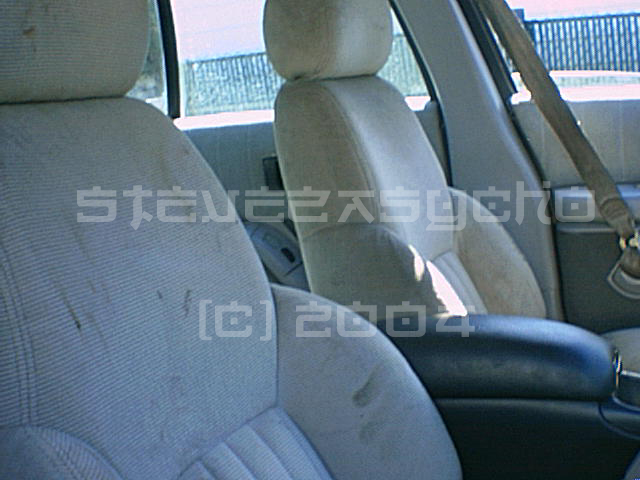
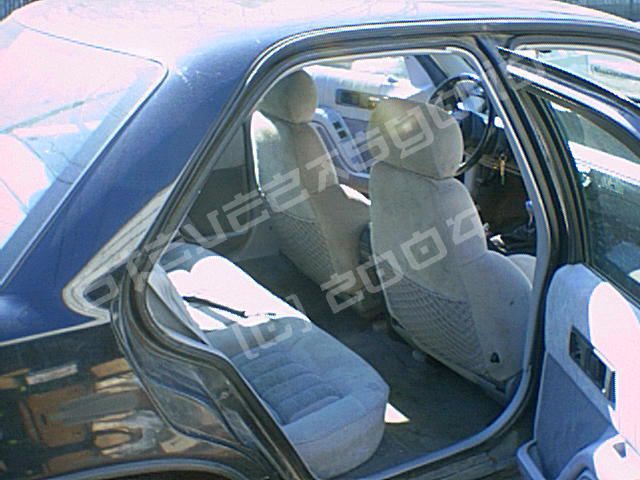 Fresh
pics of my new seats. I took a ride about 20 minutes after I put them in. I could feel a
difference right away (So could my bad back). Definitely worth the $36.00 they cost me.
There is a story behind getting these though: I first laid eyes on them about a week
before I actually bought them. The car was intact at this point, but I didn't have power
to move the seats, a required operation to remove the driver's seat. So, I left, and hoped
for the best. Well, that week screamed by, and I went out to get them, but when I got
there, the yard had MOVED THE CAR!! So I began at the first row, and finally found it
after 20 minutes of aimless wandering. I get there, and notice: the door handles are gone.
The doors are locked. The windows are intact. Some ass clown took the door handles off,
and locked the car because he wanted the seats. (Keep reading to understand how I knew).
So, I am really pissed, but I went ahead and removed the fender. Set it aside, and went to
town on the bolts that hold the door to the car. I am at this point thinking, "Yea,
this will be easy now." But, at the end of that thought, I DROPPED MY SOCKET WRENCH
INSIDE THE CAR! I am furious now, and told myself I wasn't giving up. I wasn't leaving
without my seats.. Or my socket wrench for that matter. So, I start to rip and pull at the
door. Rage finally kicked in like a turbo on a Grand Prix, I tore the door off, ripping
the steel, molding poppin off, and finally, off it came. I then threw the door across the
aisle, and it hit a poor Pontiac Tran Sport. I got so many looks of fear from the other
yarders, but I just went nuts of the seat removal. After about 45 minutes, I got the seats
out, and wheeled off with my wheel barrow, and I saw some foreign guy come up to the Grand
Prix I just left. When he saw the door was "in dispose" and the seats were gone,
he screamed an obscenity of some sort, and I just said to myself, "Ya snooze, ya
lose, sucker." I looked at him stomping around like a child and saw in his hand the
door handles for the car. The reason I know they came from that car is because these ones
had "Pontiac" written up and down them. I just wheeled out of there one happy
dude, and foiled an ass hat in the process!
Fresh
pics of my new seats. I took a ride about 20 minutes after I put them in. I could feel a
difference right away (So could my bad back). Definitely worth the $36.00 they cost me.
There is a story behind getting these though: I first laid eyes on them about a week
before I actually bought them. The car was intact at this point, but I didn't have power
to move the seats, a required operation to remove the driver's seat. So, I left, and hoped
for the best. Well, that week screamed by, and I went out to get them, but when I got
there, the yard had MOVED THE CAR!! So I began at the first row, and finally found it
after 20 minutes of aimless wandering. I get there, and notice: the door handles are gone.
The doors are locked. The windows are intact. Some ass clown took the door handles off,
and locked the car because he wanted the seats. (Keep reading to understand how I knew).
So, I am really pissed, but I went ahead and removed the fender. Set it aside, and went to
town on the bolts that hold the door to the car. I am at this point thinking, "Yea,
this will be easy now." But, at the end of that thought, I DROPPED MY SOCKET WRENCH
INSIDE THE CAR! I am furious now, and told myself I wasn't giving up. I wasn't leaving
without my seats.. Or my socket wrench for that matter. So, I start to rip and pull at the
door. Rage finally kicked in like a turbo on a Grand Prix, I tore the door off, ripping
the steel, molding poppin off, and finally, off it came. I then threw the door across the
aisle, and it hit a poor Pontiac Tran Sport. I got so many looks of fear from the other
yarders, but I just went nuts of the seat removal. After about 45 minutes, I got the seats
out, and wheeled off with my wheel barrow, and I saw some foreign guy come up to the Grand
Prix I just left. When he saw the door was "in dispose" and the seats were gone,
he screamed an obscenity of some sort, and I just said to myself, "Ya snooze, ya
lose, sucker." I looked at him stomping around like a child and saw in his hand the
door handles for the car. The reason I know they came from that car is because these ones
had "Pontiac" written up and down them. I just wheeled out of there one happy
dude, and foiled an ass hat in the process!
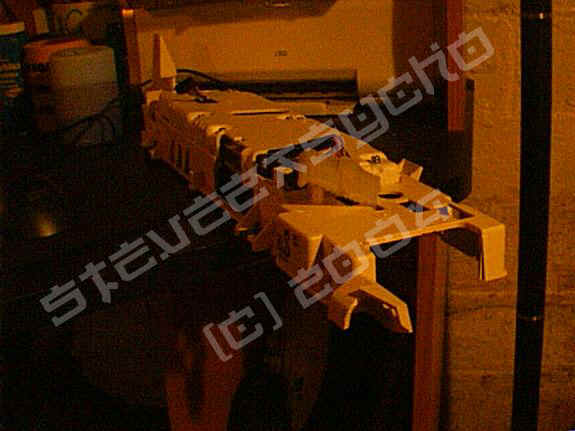
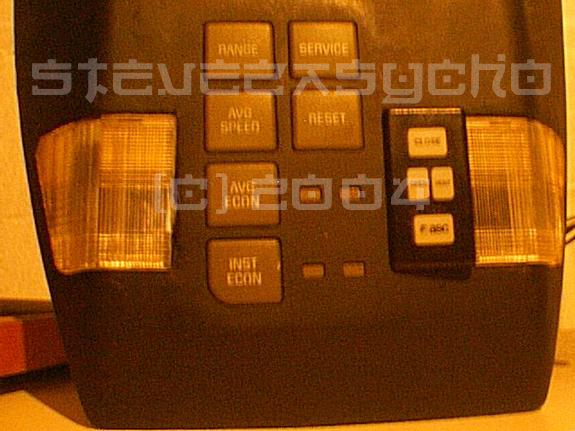
 The UB3 Digital dash
from a Cutlass Supreme in action.. This thing has to be the coolest gauge cluster EVER.. I
will get it to work in my car, and man.. Watch out all you pedestrians.. i won't be
watching the road anymore!
The UB3 Digital dash
from a Cutlass Supreme in action.. This thing has to be the coolest gauge cluster EVER.. I
will get it to work in my car, and man.. Watch out all you pedestrians.. i won't be
watching the road anymore!
![]() The progress of the Cutlass UB3 Digital project!!
Check this action out!!
The progress of the Cutlass UB3 Digital project!!
Check this action out!!
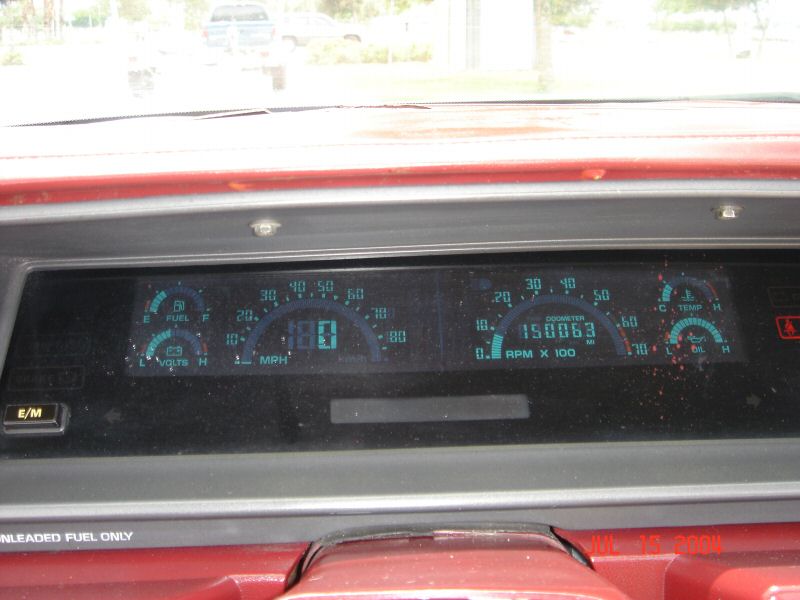
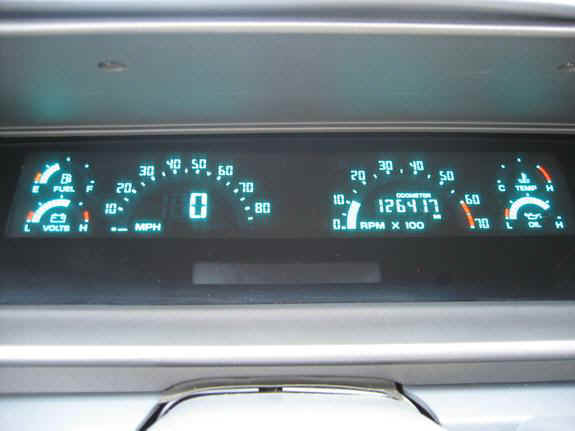
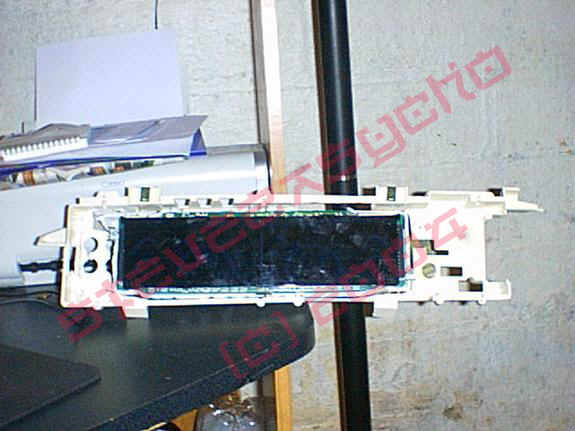
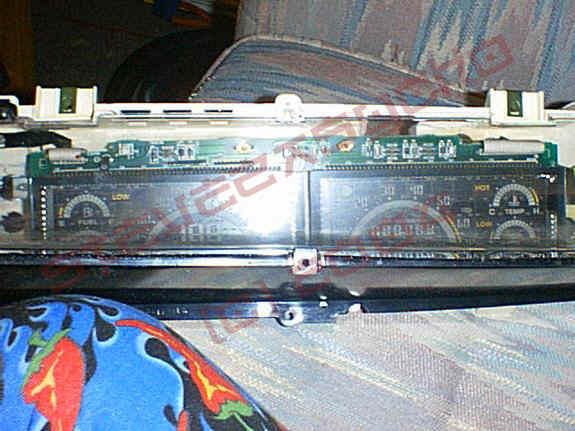
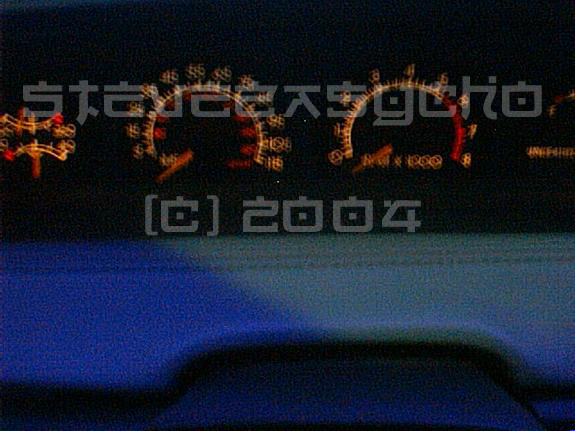 A long last look at the Lumina gauges lit up. This
is the end of the line for these bad boys. I liked them alright enough, but.. I decided to
do something different.. Something no one else has thought of before and actually followed
through on.
A long last look at the Lumina gauges lit up. This
is the end of the line for these bad boys. I liked them alright enough, but.. I decided to
do something different.. Something no one else has thought of before and actually followed
through on.

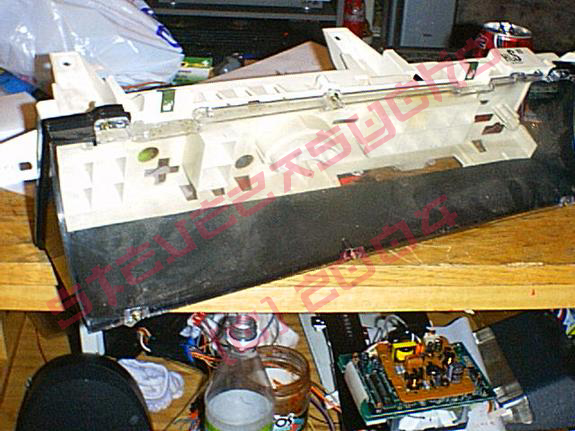
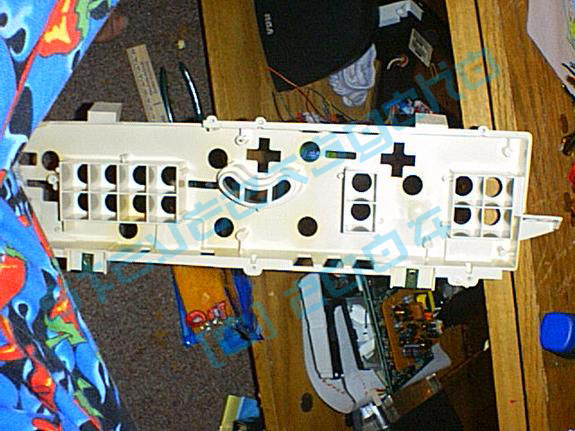
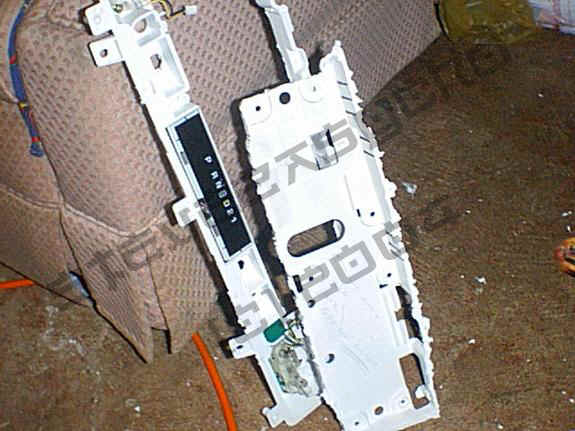
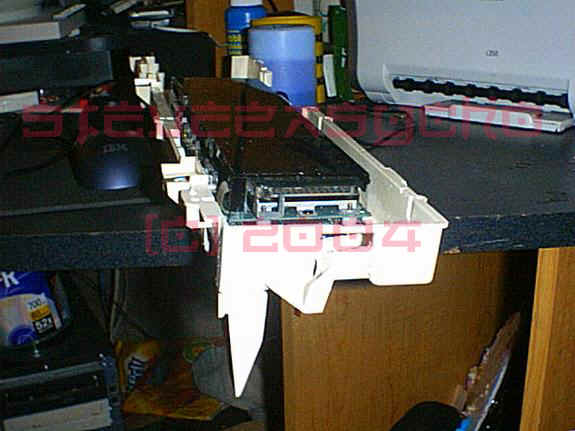
Quick set of pictures showing the progress of the unit. It goes right in order from where I began, to where I am at now. A small setback ocured when a friend broke my UB3.. I got a new one, then the housing I built broke. So, the project is at a halt at the time of this update. I am offering up my services to add these things, build them, all of it for other WBodies. Check the For Sale section!
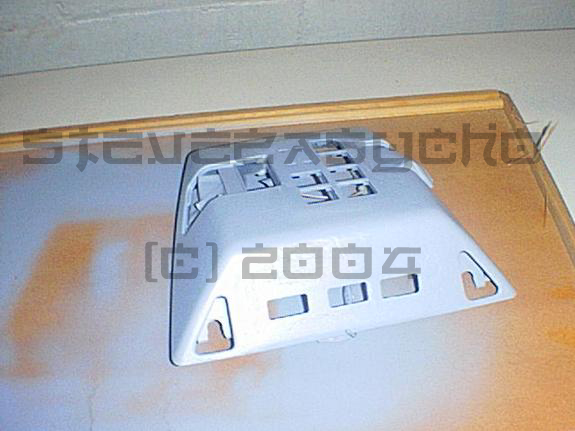
![]() This is a smattering of pictures, depicting another aspect of the
digitalization of the Lumina. It is an Overhead Console from a Pontiac Grand Prix, and it
has been heavily modified to accomodate all of the digital functions of the UB3 Digital
Cluster, and the DIC. Also, the Sunroof controls will be affixed soon.
This is a smattering of pictures, depicting another aspect of the
digitalization of the Lumina. It is an Overhead Console from a Pontiac Grand Prix, and it
has been heavily modified to accomodate all of the digital functions of the UB3 Digital
Cluster, and the DIC. Also, the Sunroof controls will be affixed soon.
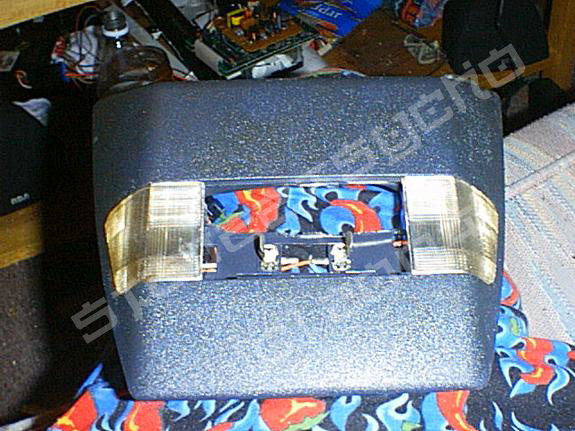

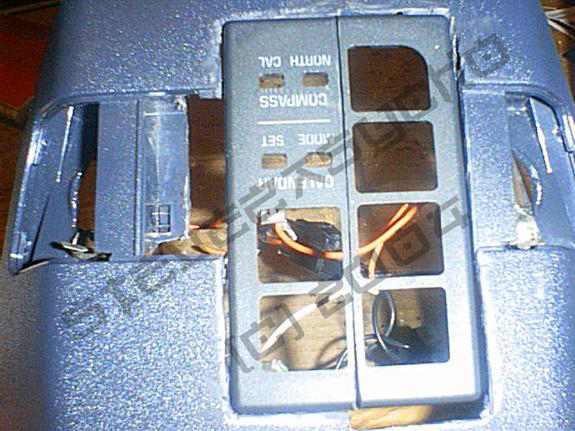
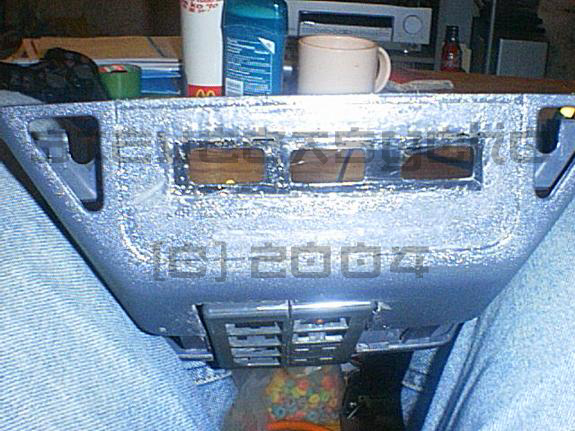
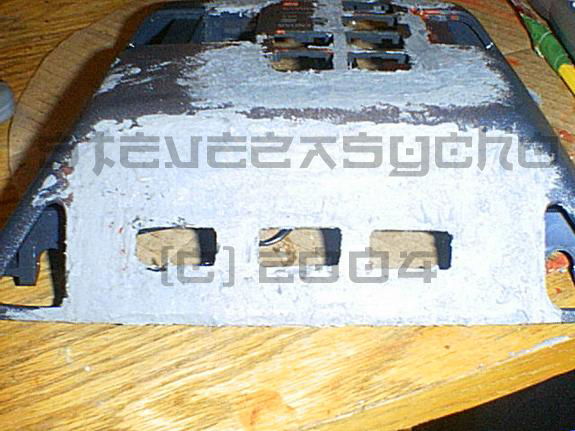
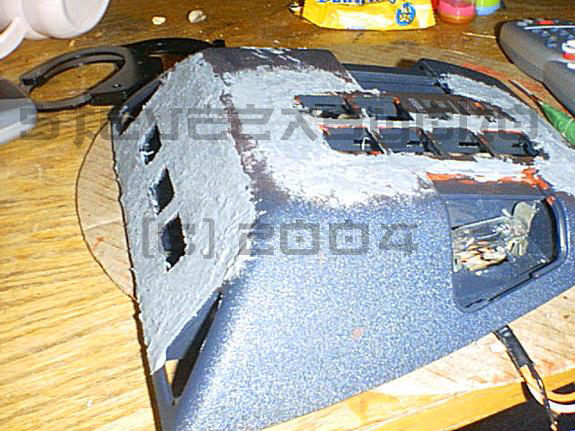
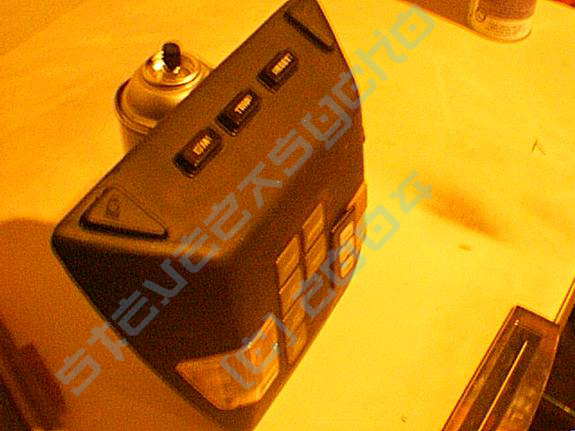
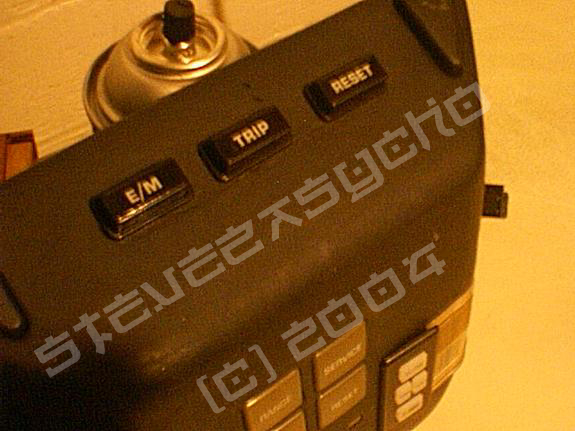
This was a very involved modification, because precision and focus on the finish was extremely important. One thing that I may change, and certainly will not make it to other versions in the buttons for the map lights. Because the WBodies and other cars I may eventually do this in have illuminated mirrors, the buttons to activate the lights within the Overhaed console are redundant. Also, because this is replacing my dome light, it would jkust be a different version of the same thing. (The stock dome light is being lost with the installation of the ASC sunroof.) Again, check the For Sale section. I will be selling my services of constructing these things, with any features you could possibly want, and I can fit in there of course.
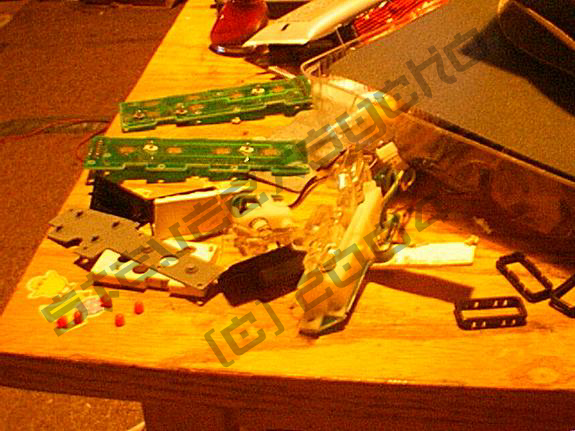
![]() The sunroof I've been gunning for for many moons. I finally have
it. And I got it at a steal! $24.00 USD!! I need to reassemble it of course, but.. I have
me a sunroof! Check the pics!
The sunroof I've been gunning for for many moons. I finally have
it. And I got it at a steal! $24.00 USD!! I need to reassemble it of course, but.. I have
me a sunroof! Check the pics!
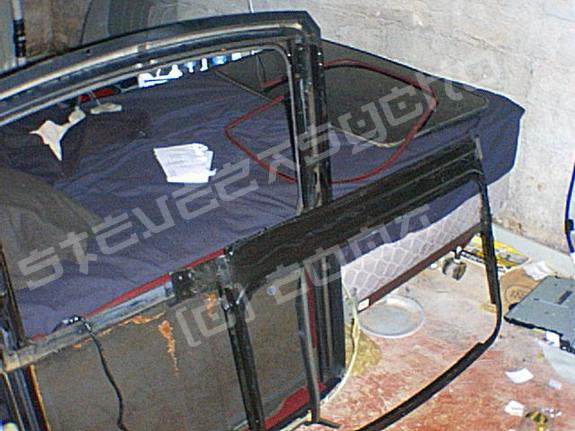
I'm totally thrilled about getting this in. I have wanted one for a long time, as stated above. Gonna be one of those little extra features that not many sedan Lumina owners have..
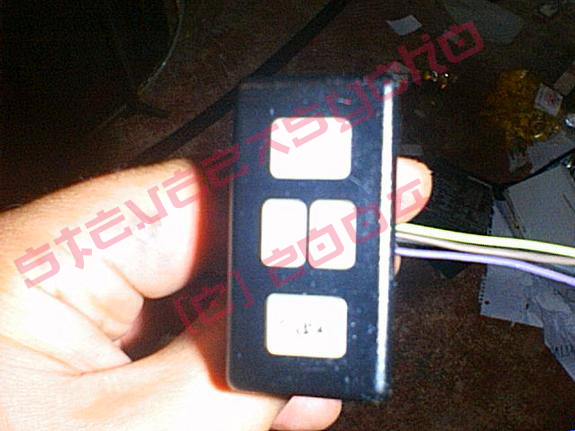
![]()
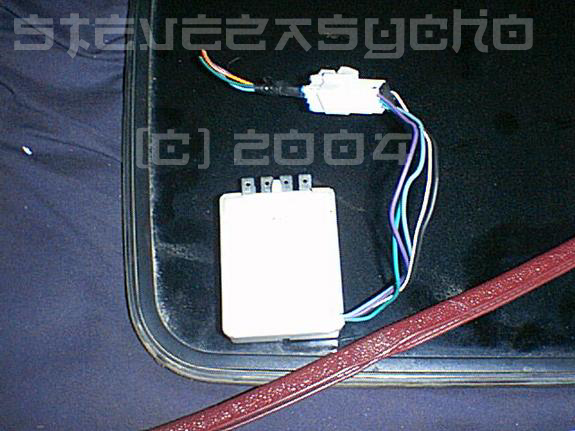
Haha.. I have me a ding box from a 94 WBody. This is the style that locks and unlocks the doors by itself. And I get an actual ding instead of a constant tone.. Going to be a sweet sweet annoyance when its all done.